💡 What is the difference between categories and attributes on your custom map?
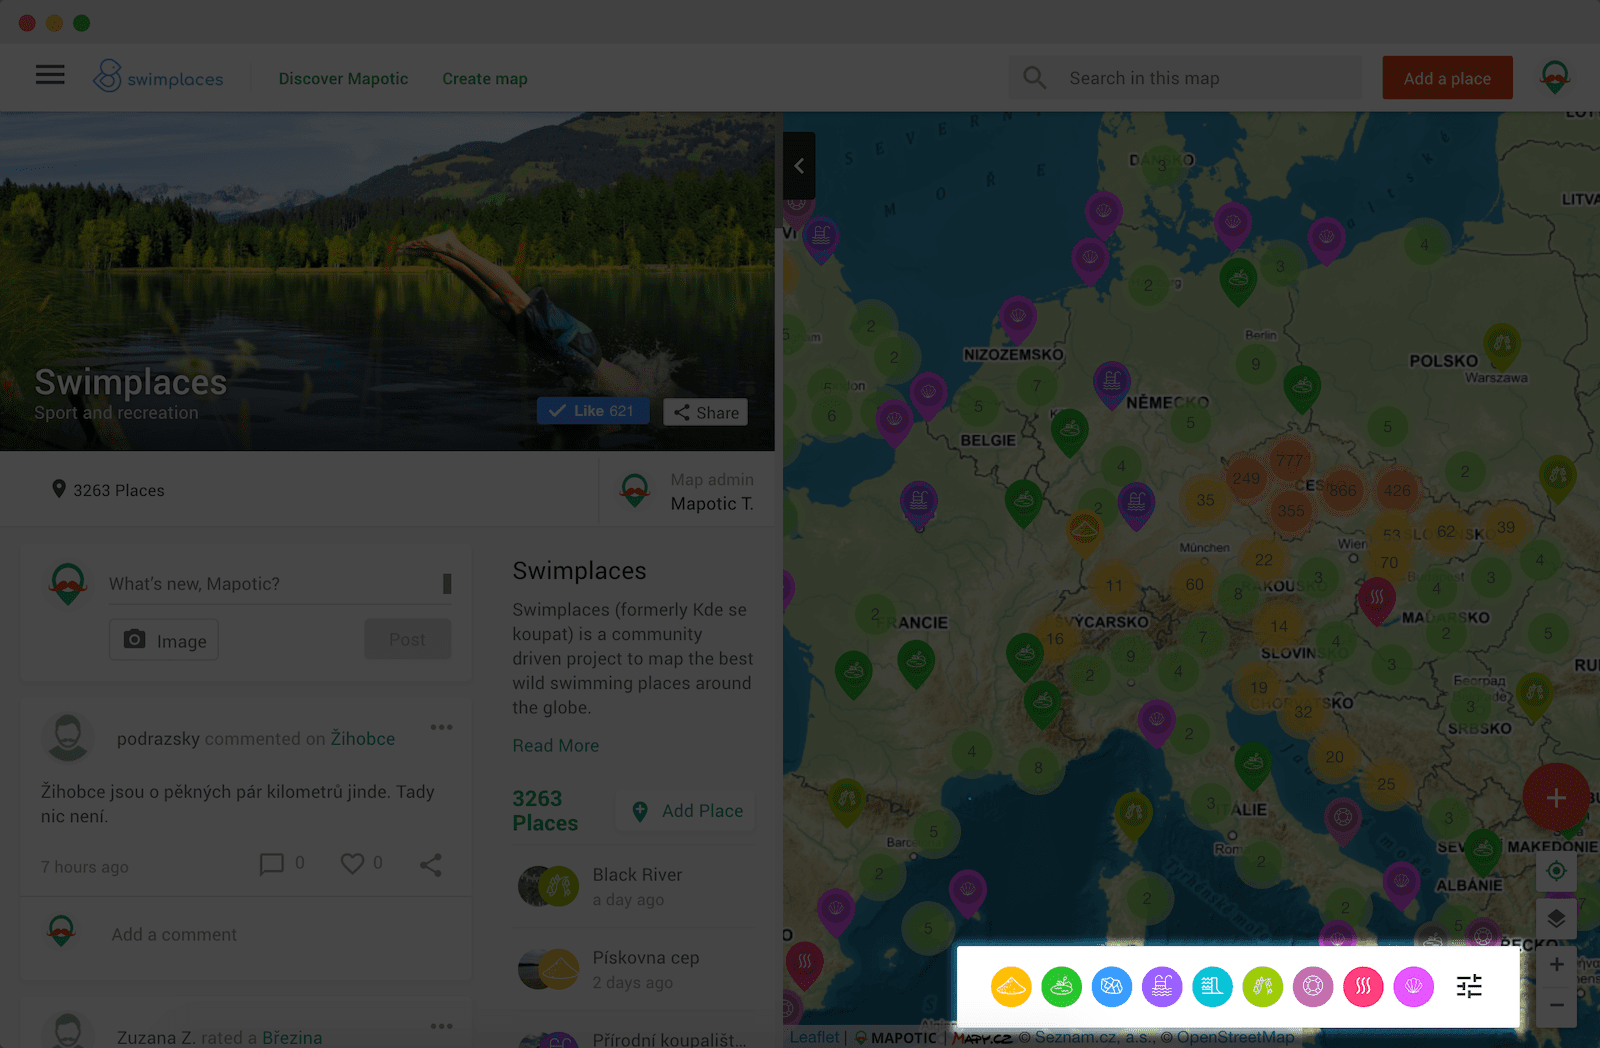
Thanks to categories, users can search for specific points of interest and filter specific places on the map
Category navigation bar can be found on the bottom right portion of your map.
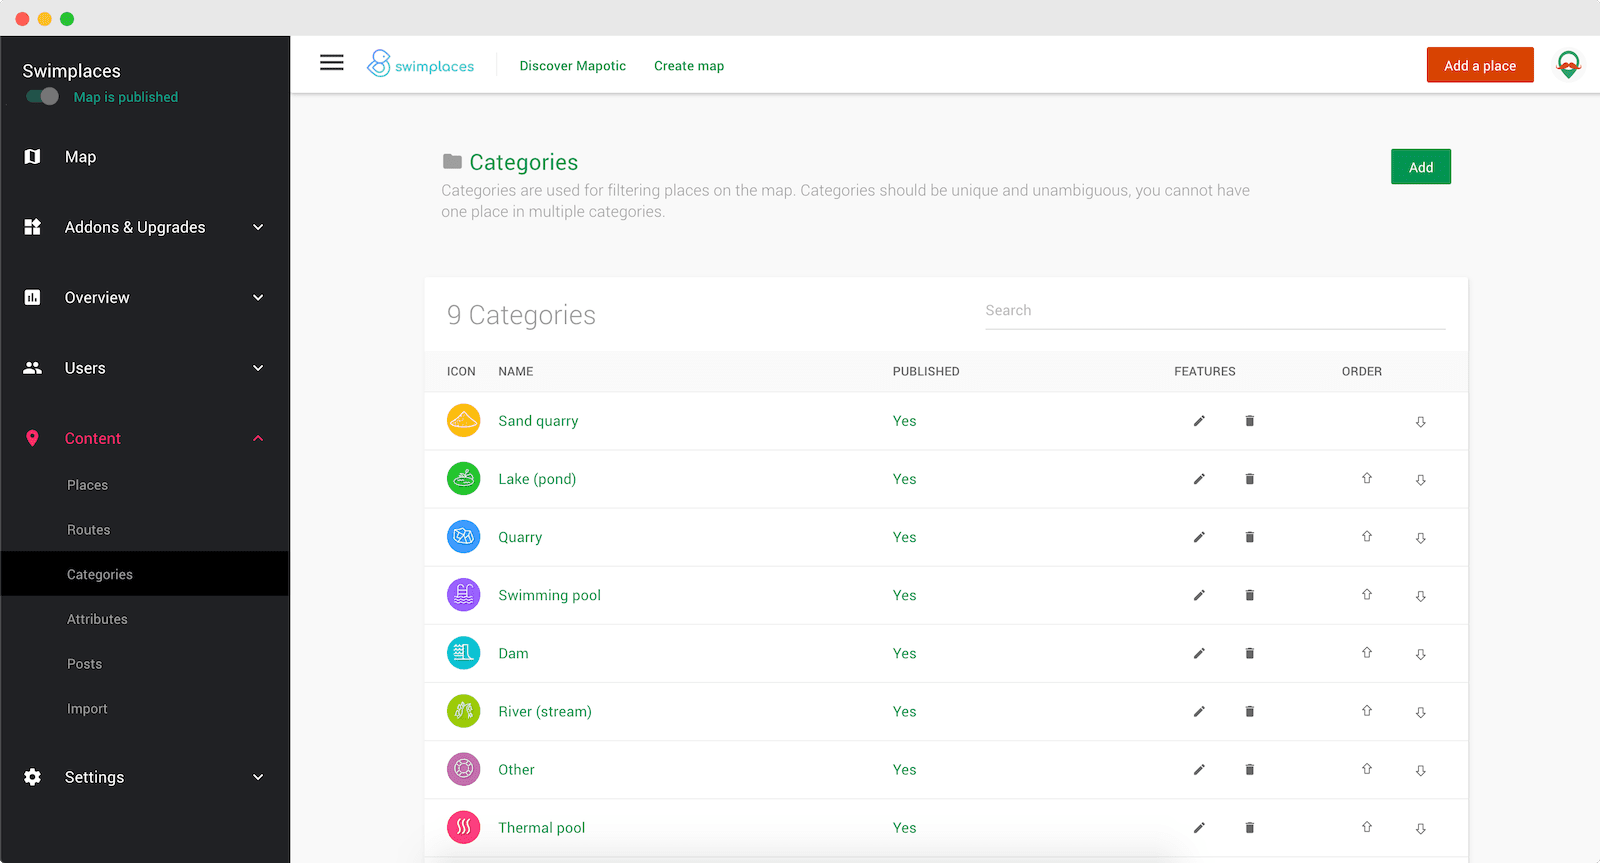
You can manage categories in the left administration menu under Content -> Categories.
Pro tip 💡
We highly recommend keeping the total number of your categories under 8. More categories make navigating through your map more confusing to the users. Create less specific categories that will be able to fit as many place types as possible.
We only allow one category per place for multiple reasons. The main reason is the visual representation on a map where one color and one icon needs to be assigned to one place. One option is adding the same place twice (once in each category). However, a better approach would be to reconsider your category structure or use multiple list attributes with sub-categories.
Pro tip 💡
If you do not have a given category or attribute on the map during the data pairing process, you can add them at any time and then return to your import in the “Import Menu”.
Learn more about attribute types 💡
Before choosing attributes that are good fit for your map, learn more about attribute types.
There are multiple attribute types, and you can also assign a set of attributes that will be available for each category. If an attribute doesn’t match a location in one or more categories, you can easily remove it in Settings.
We highly recommend checking out the Discover page, where you will find many completed and successful map projects. You can take inspiration from the data structure that has worked well for these popular maps.
If you have already created a custom map and would like to focus on promoting it, you will find a few useful tips in our article on this topic.
We wish you good luck with your map projects!
To give map administrators a better overview of the content users have contributed to their map, we recently updated the Followers section with more statistics
We have recently updated the Users & Permissions section in the Mapotic Map Builder. The UI when adding map administrators or users with access to
The newest addition to the list of Mapotic attributes is called Label. It can be used to add additional labels (tags) to a place, route